
Installation
This page will guide you through the process of installing TypeIt4Me on your Mac and granting it permission to expand your typed abbreviations. It assumes you have already purchased TypeIt4Me from Apple via the Mac App Store.
This page will guide you through the process of installing TypeIt4Me on your Mac and granting it permission to expand your typed abbreviations. It assumes you have already purchased TypeIt4Me from Apple via the Mac App Store.
There are two places on the Mac App Store where you can download and install TypeIt4Me: its listing page and the purchased apps section of your account page.
When you first buy TypeIt4Me it will be downloaded to the Applications folder on your computer. As soon as it’s finished downloading, the button next to its icon on the listing page will change to say “Open.” You can click that button to launch TypeIt4Me and then (optionally) authorize it to expand your typed abbreviations.
To install TypeIt4Me on another one of your computers, make sure you’re signed in to the same Apple account you used to purchase it, then do one of the following:
Go to the TypeIt4Me listing page in the Mac App Store and click the download button (it looks like a cloud with a downward pointing arrow overlaid on it). Once the app has fully downloaded the button will change to say “Open.” Click the button to launch TypeIt4Me.
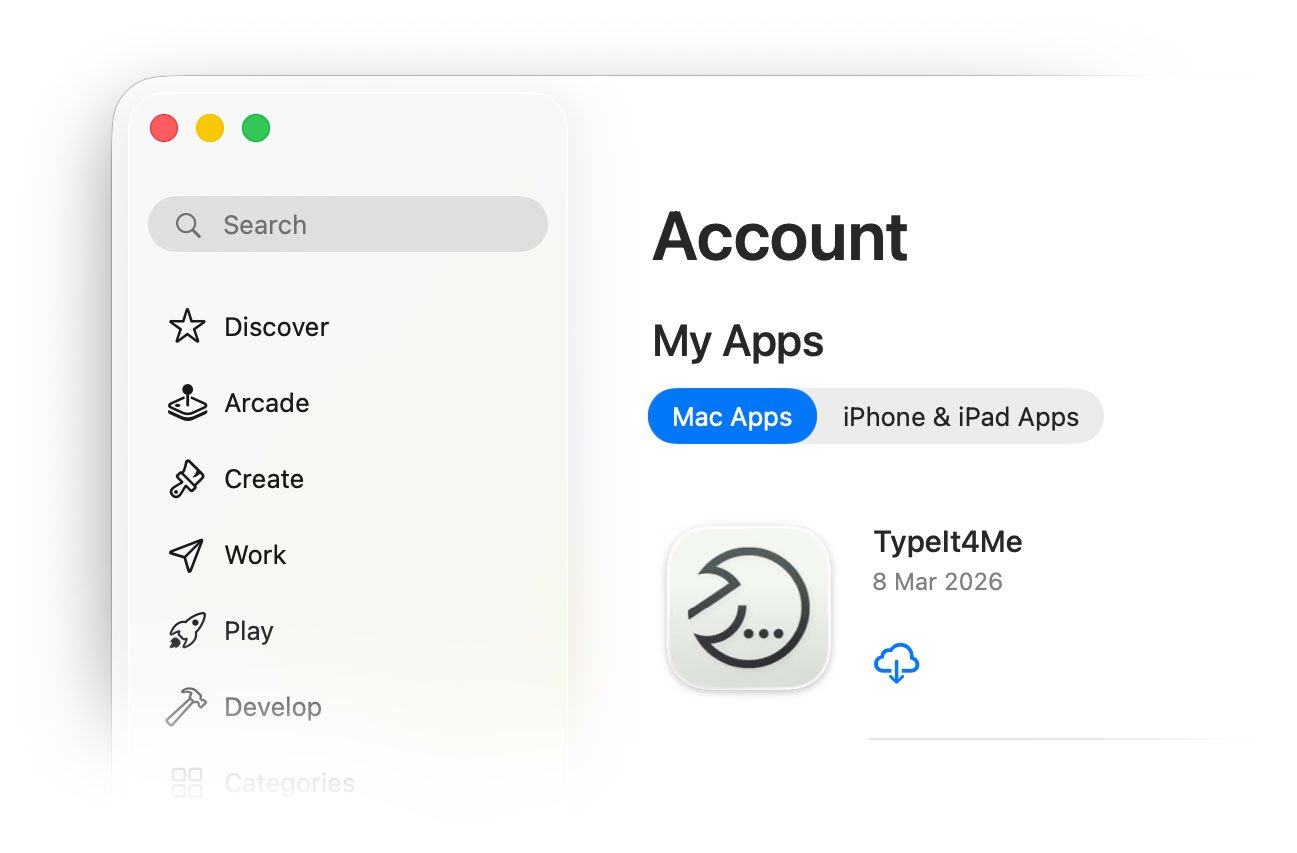
Open the Mac App Store and click on your name where it appears in the bottom left corner of the window. Browse through the list of apps you’ve purchased to locate TypeIt4Me. Click the download button next to its icon (it looks like a cloud with a downward pointing arrow overlaid on it). Once the app has fully downloaded the button will change to say “Open.” Click the button to launch TypeIt4Me.
When you first launch TypeIt4Me it will ask you for permission to control your computer using accessibility services. This is required if you want it to expand your abbreviations when you type them. It’s also needed if you want it to insert snippets for you directly when these are picked from the point-and-click menu or search window. Without it, you’ll have to manually paste the snippet content yourself after selecting it.
To enjoy the full benefits of seamless text expansion, follow these steps and ensure that TypeIt4Me has the permission it needs to operate most effectively.
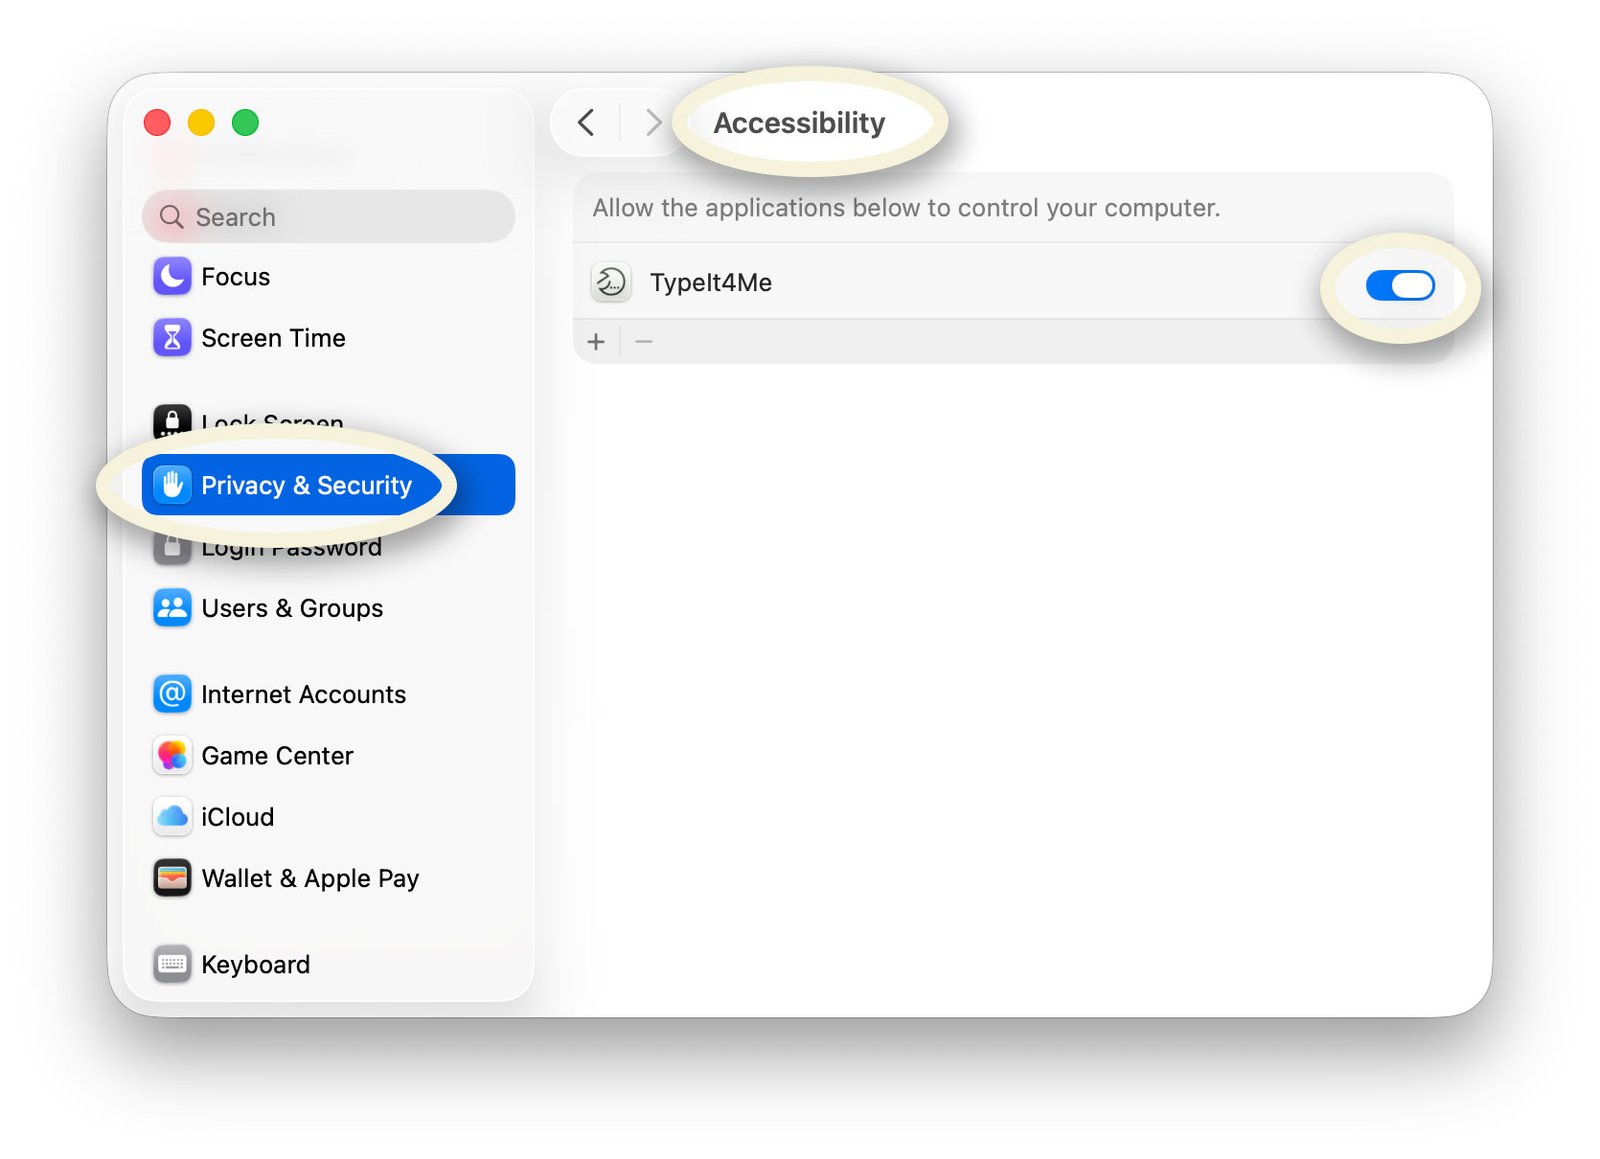
If you’d like to gain a better understanding of what all this accessibility permission stuff is about before granting access, there’s a good Accessibility Access explainer over at How-To Geek. Essentially, though, TypeIt4Me requests Accessibility Access because this allows it to know what keys you’re pressing on the keyboard. It’s also needed for TypeIt4Me to perform actions on your behalf in response to those key presses. When the permission is granted TypeIt4Me can expand typed abbreviations for you by manipulating the clipboard to paste your full snippet content over them.
While granting access unlocks the full range of TypeIt4Me’s abilities and will make it far more convenient to use, it’s not mandatory. You don’t have to authorize TypeIt4Me to control your computer. You can still build up and manage a library of snippets that can be copied and pasted. Just be aware that if you don’t grant the accessibility permission as outlined above TypeIt4Me’s functionality will remain limited. Your typed abbreviations won’t expand. You will only be able to use the point-and-click menu to browse and select snippets to copy to the clipboard. You’ll then need to manually paste them in the right place yourself.